Making Grand Light-up Cards

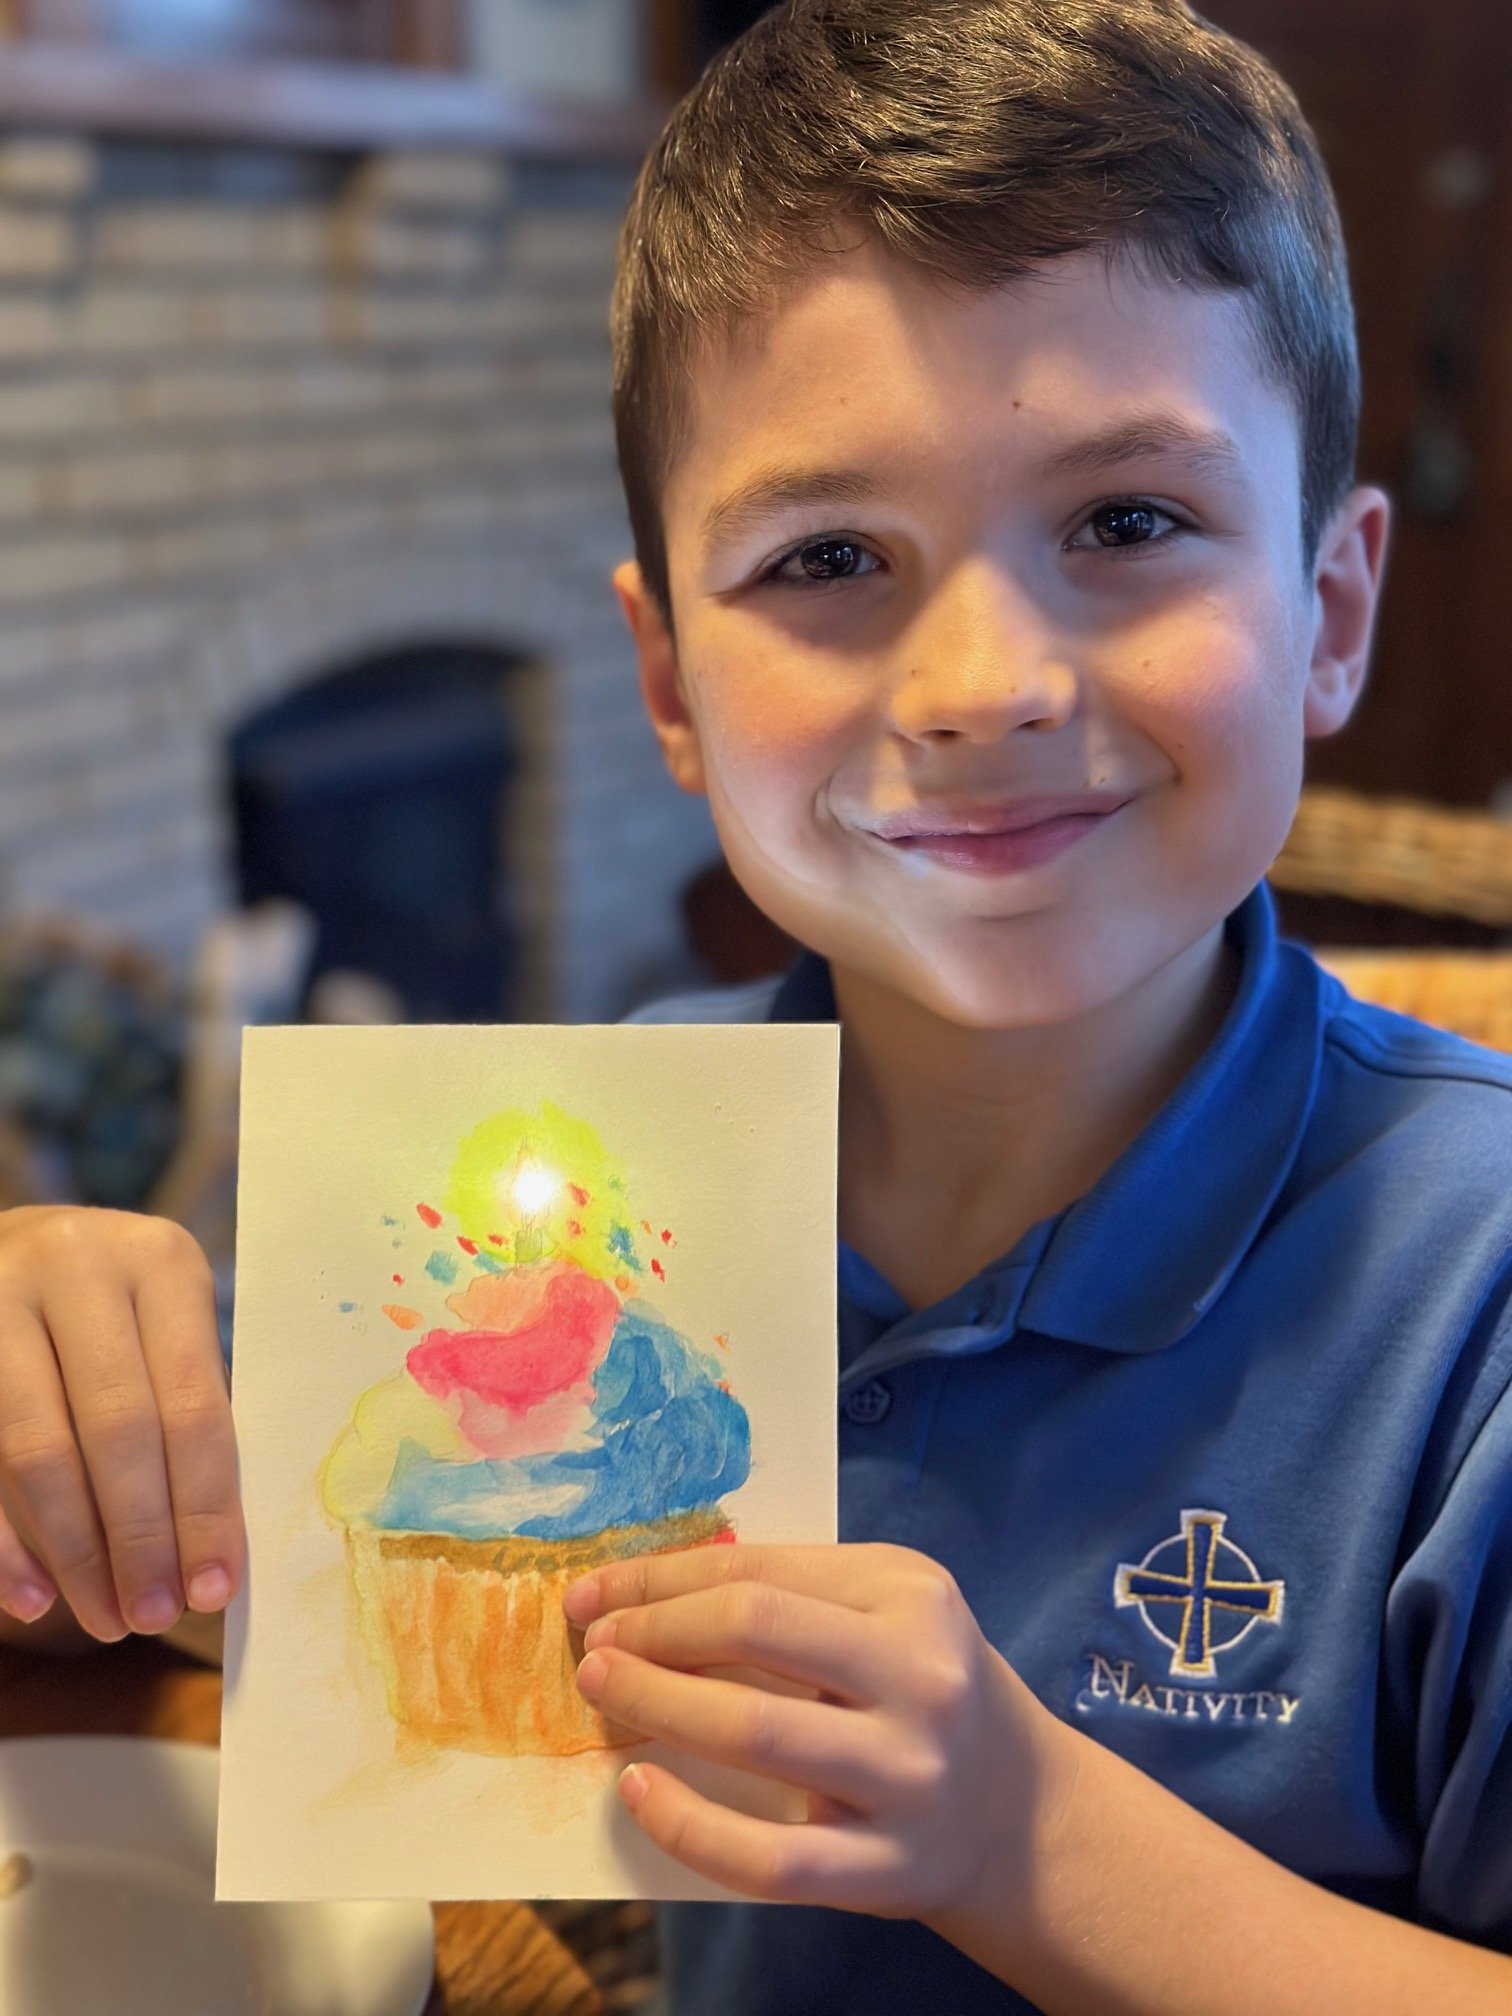
With only two after-school dates, both involving homework, and one involving piano lessons, we have to prepare ahead for special projects. Mom’s birthday was coming up, and we all wanted to make something special for her. Grace (7) has really been working on her painting, so she was assigned painting the cupcake, Jack would do his best third grade cursive, and Jack and Grandma would figure out the science to make the cupcake candle light up. I had seen similar projects on Instagram and knew all the parts in the creation would be as much fun as the giving.
If you’ve read our Art Smart post, you’ll see that Grace has done quite well with some visuals to help her “see” the colors and shapes as she paints. She asked me to do a bare pencil outline of the iced cupcake and candle to save time, and she would paint from there. I used good watercolor paper so the card wouldn’t ripple when wet. As an artist, I have lots of scraps that work well for that, and could “score” the card for an easy fold.
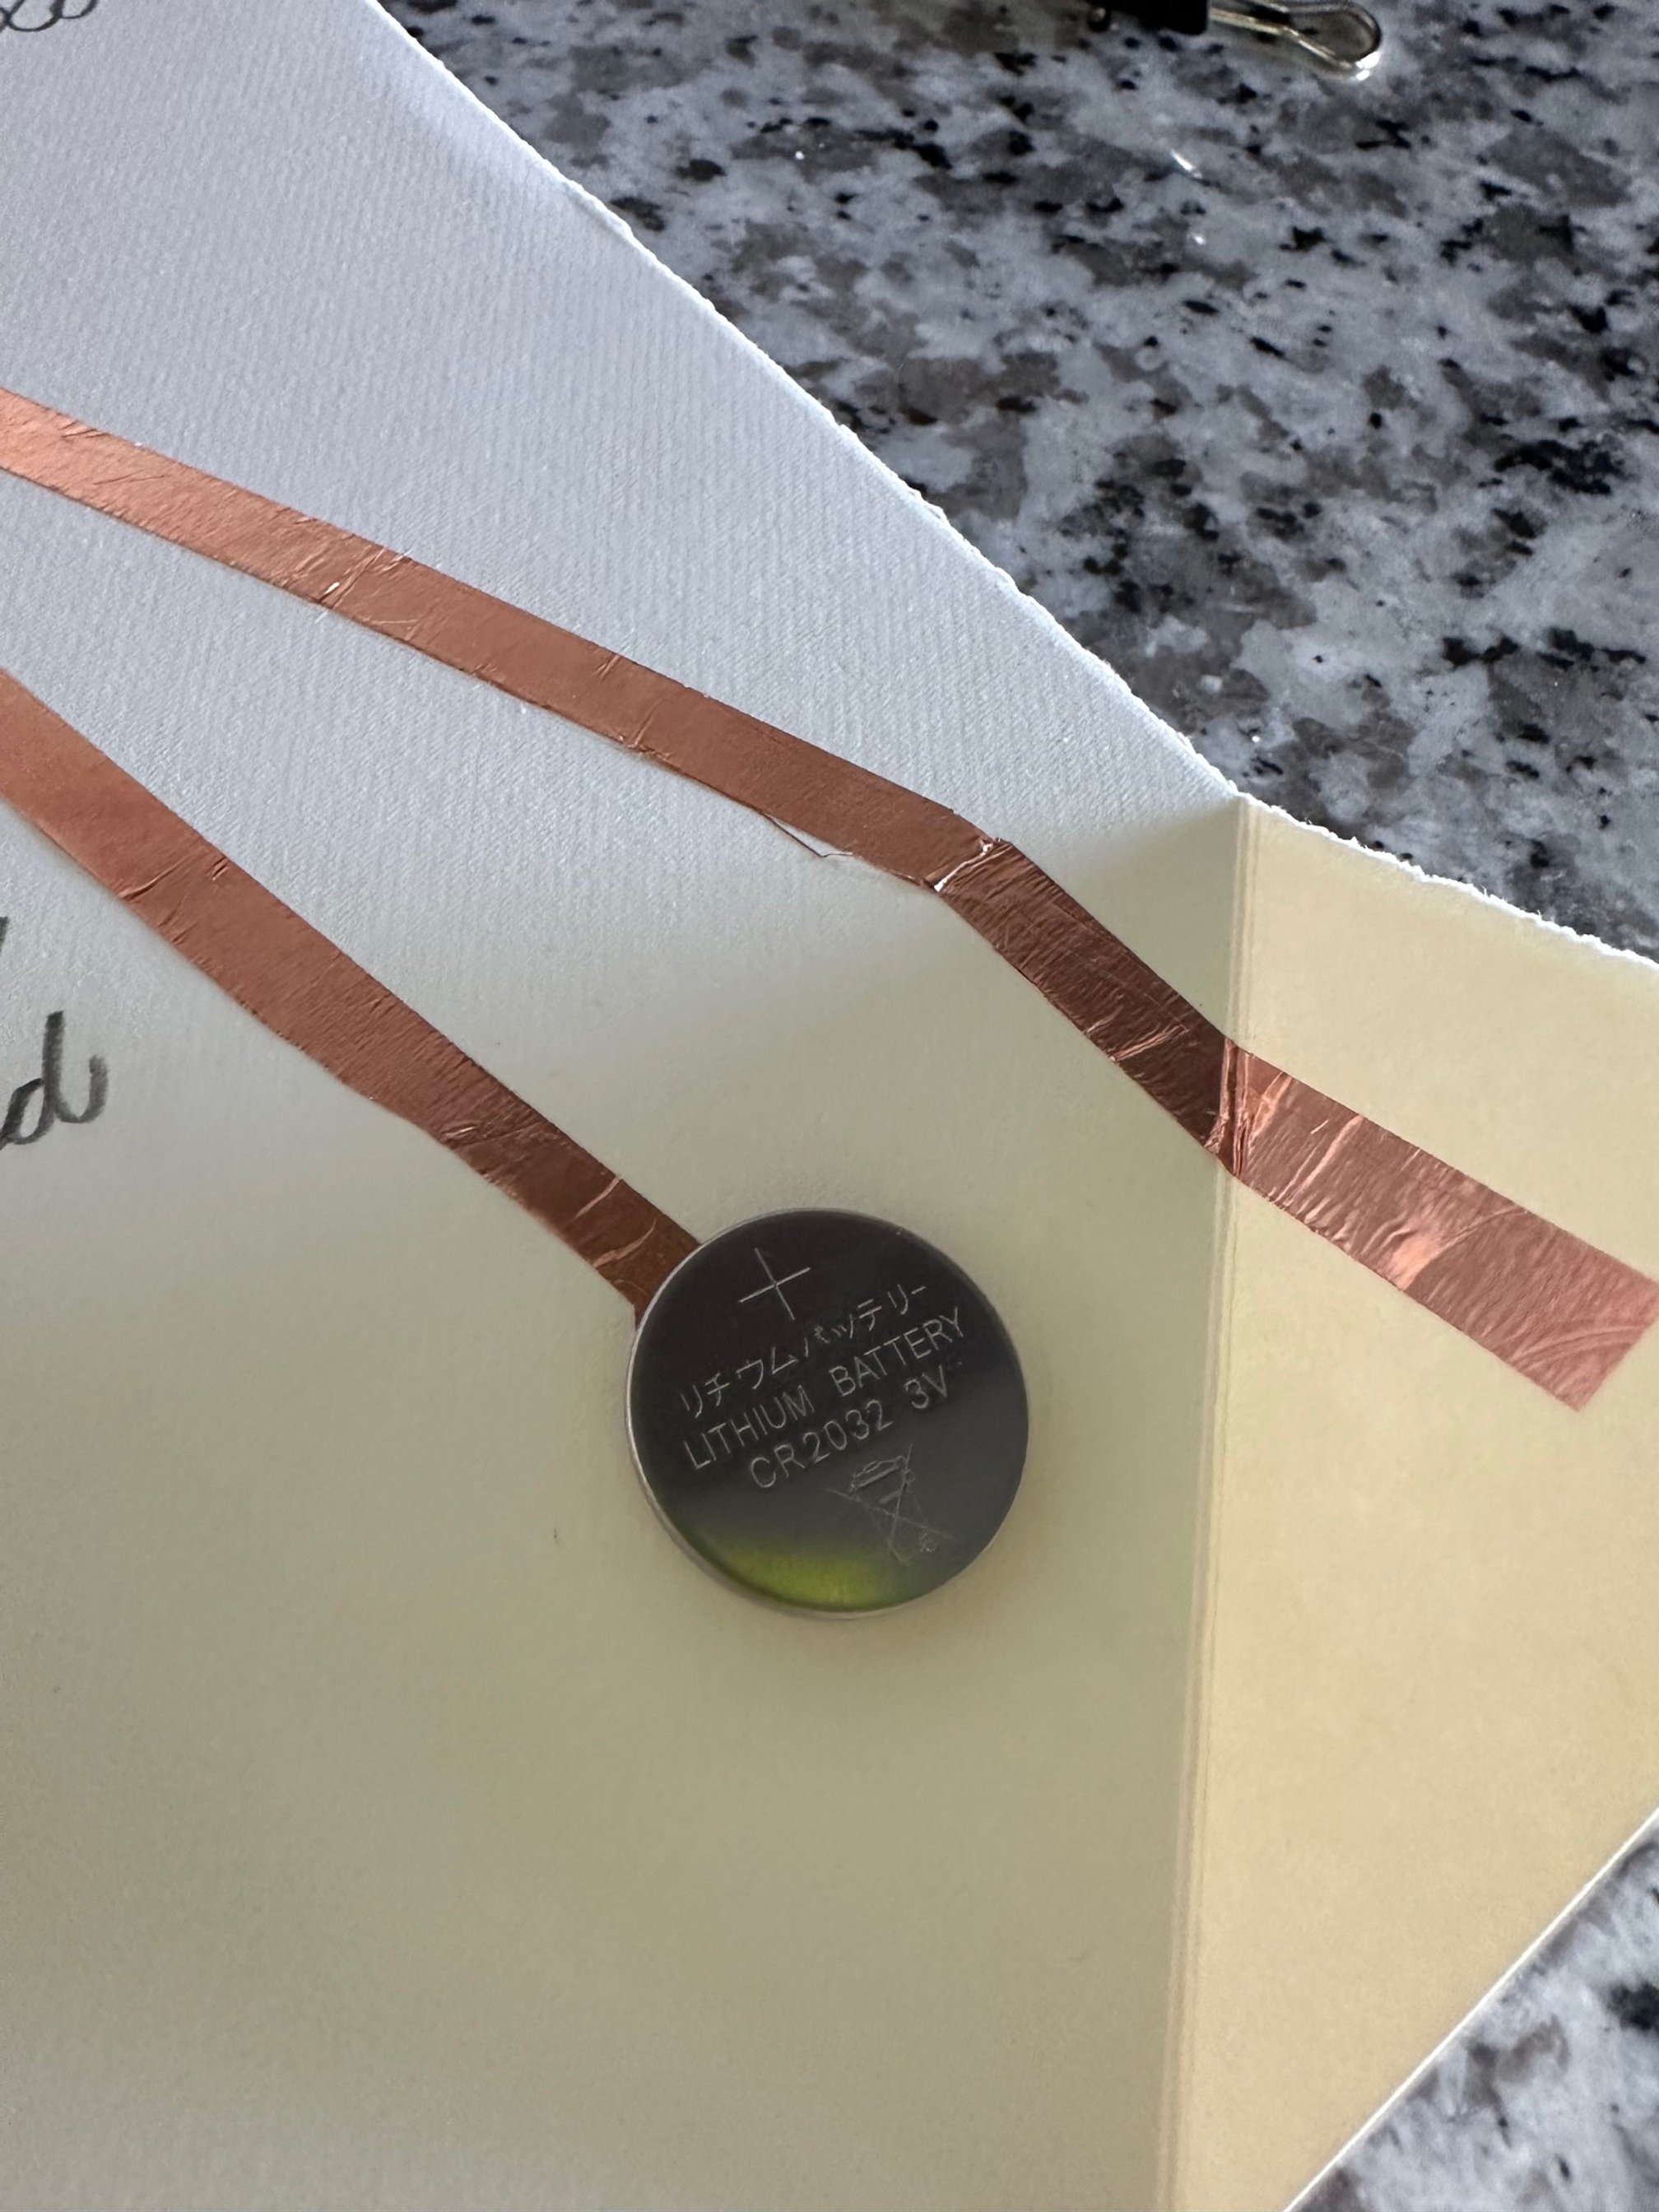
I knew we needed a tiny LED light, copper tape, and a button battery to make our card light up. We just wanted the single light of the candle for this project, but you might have another idea! I couldn’t find all the supplies at any local craft or hobby store, and found a complete kit available through Amazon, crossing my fingers it could get delivered in time! This particular kit comes the three lights that were on easy-to-use stickers, tape, and one battery, and I ordered extra copper tape in case we needed to improvise. I liked the our copper tape better, so we used that.
Once Grace’s painting was dry, we folded it, cut a small hole where she had painting the candle flame with an exact blade, and marked the spot through to the card interior with a pencil. The battery is kind of large (about the size of a nickel), so we decided on the lower right corner for placement. The LED light sticker has clearly marked +positive and -negative markings, and we needed to run the copper tape from each side of the light down to connect with the + and - sides of the battery, also clearly marked. The flap connection allows for the on/off aspect of the lighting from pushing on the front of the card. There are more fun tutorials, project ideas and supplies on www.chibitronics.com. This kit came with a light-up paper helicopter to try next! You could probably find individual supplies locally, but I was short on time, and these kits were great! And we always make THESE fab cupcakes!